Decorative Painting Techniques

Theater Painting Ideas for Your Home
Tired of dull drab walls? Bored with white wallboard? Want to bring a little excitement to your life?
Whether you're craving a little quiet, sophisticated richness of color or the Wow! of glamour or drama, you might look to the stage to give you ideas.
One of the rich craft traditions developed in the theater is scenic painting, the art of fast and effective decorative and faux paint techniques. Many of these techniques fit right in at home too! And most are surprisingly easy and fun to learn.
This Lens will show you how to apply simple stage paint at your house.

Decorative Painting
The difference between what we'll call "decorative" painting and the standard way to paint a wall at home is that the goal of ordinary painting is to create as flat, plain, and perfectly even a color as possible, while decorative techniques (like these ones borrowed from the theater) aim for a varied and richly modulated color.
And it's a lot more fun!
Instead of painting as neatly and prissily as possible, you get to splash and smear and have just as great a time as in kindergarten finger-painting class. Enjoy yourself with color. You WILL want just a little bit of control (you want this to look good after all), but that's just a matter of stepping back now and then to look at the wall as a whole.
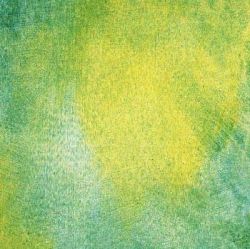
I strongly suggest that, to start out with, you choose colors very close to each other, harmonious shades that work easily together. For instance, you might try for a Tuscan stucco look. Choose an earthy dull yellow plus a darker shade, closer to tan or ochre, and a lighter, brighter shade of yellow and use those three related colors for your decorative painting. Try one or several of the techniques described below. When in doubt, try putting the darkest color on the wall first, then work over it with the lighter two colors or shades: it looks more natural when cracks or deeper parts of the wall texture are darker and high spots are lighter in color.
The essence of decorative painting is experimentation. You play around with the paint until you like the way it looks. To increase your confidence (and thus enjoyment and good results) it's always a good idea to goof around a little first on scrap paper or cardboard etc. Until you feel comfortable and like the basic look.
Then put on some music, loosen up, and paint!

Materials
Decorative painting techniques are fairly universal - they work with pretty well any kind of paint or painting. Scumbling, for instance, is used with oil paint for miniatures on ivory as well as with casein based scenic paint on plywood for stages the size of a barn. (Naturally, each paint has its own unique character.)
For household decorative painting you're probably going to want:
1) Paint - Latex house paint. If using glazes, you'll want a slight sheen like eggshell or satin, otherwise flat is fine.
Oil paint works beautifully too, of course, but I highly recommend water-based latex at least as you're starting out because of its ease of cleanup, faster drying time, and fewer fumes. In fact, consider low VOC, low-emission latex paint; more expensive, yes, but much less off-gassing and healthier. Look into the "greener" brands. (One very experienced master scenic painter recommends Benjamin Moore brand.)
2) Glaze medium. This MUST be formulated to match the type of paint - water based with latex, oil with oil. Talk to your paint supplier.
3) Water - (or possibly oil) clean water to dilute paint with and another container to soak brushes in. I also keep a bucket of clean water by me to store used brushes in (so they don't dry out) and for emergency hand-rinsing. (Might want to keep your phone in a plastic baggie for safety, eh?)
4) Mixing Containers - Plasic tubs with lids for blending, tinting, diluting paints and mixing glazes... and saving them. Also paint stir sticks.
5) Brushes - Again, suit the brush to the type of paint. You'll want some small brushes for corners and edges, bigger ones for bigger areas. I prefer a sash brush with its slant-cut bristles, but see what feels most comfortable for you. I tend to buy a few wide cheap brushes for scumbling (but not so cheap that they shed hairs) and one really nice, expensive sash brush for the fiddly bits.
6) Rollers - You will probably want to do the dull base painting with a roller for speed. Remember to get roller covers, tray, the long pole (maybe extendable) etc. etc. etc.
7) Special paint applicators - rags, sponges, etc. Read through the next sections and see what toy you'd like to play with! Sponges must always be natural sea sponges and rags are normally cotton ones... though you might experiment. I've seen scenic painters use bubble wrap, crumpled paper, and all sorts of other materials to paint with.
8) Masking - Drop cloths and masking or painter's tape. Cloth drop cloths dry faster - but can leak big spills right through - plastic drop cloths are impervious - but can get slippery with wet paint.
Anything else you'll need? Music? Jug of wine? Cheerful helpers?

Glazing
Glazing is important enough to deserve a paragraph of its own.
Glaze is clear gel-like binder that you mix with regular paint in order to make the color translucent... a bit like painting with colored Jello! In fact, glaze looks milky in the can and only clears up as it dries, so it's sometimes a little hard to realize what it's doing as you work with it. But glaze's translucency can be beautiful. It's a real addition to scumbling, for instance, making the result richer and more subtle. Glazing essentially tints what's already on the wall rather than covering it up.
In fact, one of the simplest decorative effects is to just roll or brush a coat of glaze diluted color over an already painted surface.
The catch with glaze (there had to be one) is that it's kinda expensive.
So I often ration my use of glaze by also using slight amounts water (don't want drips) and by only dipping my brush into glaze when the wall starts to look too "solid" in color.

Spattering
Spattering (often mispronounced as "sPLATtering") is a paint technique where little dots or splashes of paint are shaken off the brush onto a base-painted surface. Because of the physics of this process, spatter only works well on a horizontal surface.
At your house that means on floors or table or counter tops.
In theater, spatter is used to add a bit of contrasting color and life to an otherwise boring single color surface. It can do the same service at home. Spatter is particularly nice on painted concrete floors that are getting a "stone" treatment or on the floor of a playroom, where a colorful effect is desired. Spatter is also useful to soften any other technique or to shade a floor subtly, perhaps to lighten a floor toward a room's center and darken at the edges (or the reverse) or to lighten a floor farther from the window wall.
See the sample picture? The smaller dots are spatter... those big splashes really are sPLATter. Both can be fun!
HOW-TO:
First - wear old clothes and even a hat or scarf (you're going to get splashy!) and cover everything with drop cloths. Spatter gets everywhere. Seriously.
Paint the (horizontal) surface to be spattered the base color desired. This can be either a simple even color or a complex color created by one of the other techniques of this Lens. Let this dry - if you want crisp spatters - or, if the area is small enough that you don't have to walk on it, go ahead and add spatter while the base color is wet for a very slightly softer, bleed-into-the-base-color look. (Don't you love not having to wait around watching paint dry?)
Now, take the paint colors that you want as spatter dot colors and put a little of each into small containers you can hold easily (a plastic cup is perfect) and mix in about 1/3 water to dilute and make it fluid.
Before starting your real project, you'll want to practice on a piece of board or cardboard to get the feel for this.
Dip a nice flexible brush into the cup until wet but not running with paint and then flick this over your surface. See the pattern of dots? The best spattering looks the most random. Your dots will tend to form a dot-to-dot line at first, so just play around for a few minutes until you discover the amount of paint, water, brush wetness, and wrist flick that makes a pattern and size of spatter that you like. Then go for it!
As you walk across your floor, spattering happily, it is important to walk backward so that you can both SEE the spatter you make and NOT STEP IN IT! Let this first layer of spatter dry, then add another color, and so on until finished. At any time you can go back and add more spatter of any color where needed. As you get used to this method, you can start to cheat on the waiting for it to dry phase (tiptoeing out into the paint-y mine field). Spattering is fun!
Depending on how dramatic versus subtle a look you want, the spatter colors can contrast with the base color or be slight variations of it. (The illustration is max. drama, obviously.)
BTW It IS possible to spatter paint a piece of furniture on ALL surfaces if it is small enough to lay flat and keep flipping it so you can spatter each side as a horizontal. This can look wonderful on a child's dresser or any piece you want to have a "stone" look.
Spatter-licious!
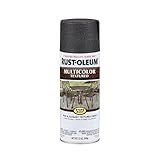
Spatter-inna-can for quick little projects. And pre-spattered fashion... to give you a head start on your painting project?


Sponging
By dipping a natural sponge lightly into your accent color paint and dabbing this lightly on your wall, you add an enormous amount of interest and texture. Two or three layers of varied sponging can give a stone-like effect.
The important things in sponging are:
Not to saturate the sponge. You want a light amount of paint and will probably want to blot it before dabbing the wall.
Turn the sponge each time, so it's print will vary and you won't get a repetitive pattern. (Unless, of course you want one.)
Take your time. Don't try to do too much or too large an area at first.
Of course, there IS the easier method where you use a special sponge-texture roller. This speeds things considerably, but just has to create more obvious repeat to the pattern. I'd suggest varying your angle of rolling and over-rolling plus some hand sponging to soften this (and to get into difficult corners).
Sponging Demonstration
A decorator shows you how to apply paint with a natural sea sponge. (Not the synthetic sponge from under your kitchen sink!) Sponging is easy... but can get tedious over a large area... as you may suspect after watching this!
Natural Sea Sponge - The Painter's Friend
It's those irregular holes and the unpredictable pattern that those holes make that the decorative painter treasures. Never try painting with boring synthetics... Go Natural!
it's important to keep your sponge damp at all times - once it dries, it's nearly impossible to get hardened paint out of it, so rinse well!

Spongy Fun
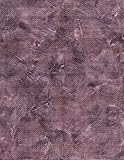
Some sponge painting tools - including a sponging kit (dontcha love kits?) AND a ragging kit, plus a few "sponge" patterned table cloths just for fun.


Ragging
The basic idea is to use a paint-y rag to add color to an already base-painted surface. There are two methods: first to wad the rag up (as if blotting up spilled milk in the kitchen), dap that wadded rag into the accent paint, then dab that onto the surface, or, second, to roll the rag into a sausage shape, get it paint-y, then roll it onto the surface. That simple.
It is possible to "rag" roller too. I'm sure there are spiffy special rollers, but you can also just wrap a regular roller in rag and rubberband it there. As with sponge rollers though, there will be obvious repetition of the pattern, so you'll need to soften this with re-rolling and hand ragging.
You'll want to wear rubber gloves and old clothes because you can get pretty mucky doing this - that's half the fun. I also suggest a bucket of clean water to rinse those gloves off in when things get slimy.
A Fun Video on Ragging
I love the narrator / demonstrator of this vid: "Drippage beware," indeed! A nice straightforward explanation and the setting is clearly a theatrical scene shop, which adds to the atmosphere.
Decorative Painting
This author really knows her stuff - and has written a bunch of books on the subject of decorative painting. (I own a couple of them.)
Decorative Painting? - Ha! THIS is decorative painting.
This book is inspirational.
It's not really about decorative and faux finishes - though they're used - just as the Sistine Chapel ceiling isn't really about decorating.
The work showcased here shows you what can be done at the very highest end of "decorative" painting... beautifully designed and painted (and drawn this guy can DRAW!) faux painting. Distant views, tiny still-life compositions, theatrical, charming, colorful... Glorious examples of mural painting.
And, yeah, he must use that same rag and sponge you and I do.
I own and love this book.

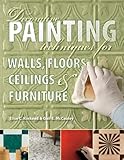
More Mundane Books on Decorative Painting Techniques - Sometimes ya just need advice.
How-to books on faux and decorative painting. Enjoy!


Marbleizing
(Soon to Come)
This topic may need a whole Lens of its own.
I love painted "marble." It's so much fun both to do and to live with... and surprisingly easy.
Please visit again later for either a few paragraphs on this technique... or a link to a whole lot more (depending on how carried away I get).
The Perfect Paint Brush - (For me anyway)
I MUCH prefer a brush with angle cut bristles - a sash brush - because it just feels more comfortable. It allows me to hold my hand and arm at a comfortable angle and have a freer motion when I'm doing something loose with paint... like scumbling or marbleizing.
Try it yourself.

Links to more on Decorative Painting
- Spatter Paint a Floor
Here's a howdididoit.com article on spatter painting a floor. Spattering really only works on a horizontal surface! - Better Homes and Gardens Links
Links to all sorts of decorative painting topics. - Home Depot Video - Basics of Decorative Painting
A really good explanatory video... though somehow the demonstrator makes this sound like less work than I know it is! - Paint Quality Institute
Now these are the serious for-the-trade videos on all sorts of topics, including the psychology of color and painting techniques. - Benjamin Moore "Decorative and Faux Painting"
The paint company's useful pages of explanation for all sorts of decorative painting techniques.


